By default, Windows 10 creates regular restore points for your computer. What this means is that should something go wrong during an update or when installing new hardware, you’ll have a way to “restore” it to a previous time. Occasionally, you may have a reason to create a restore point on Windows 10 manually. I often do this before cleaning up a computer loaded with malware or before installing new hardware. I ALWAYS create a restore point before making changes to the Registry.
It’s easy to do and only takes a few minutes. Here’s how:
- In the search box on the taskbar (bottom left corner of your screen), type “Create a restore point”
- Select “Create a Restore Point” from the list of results.

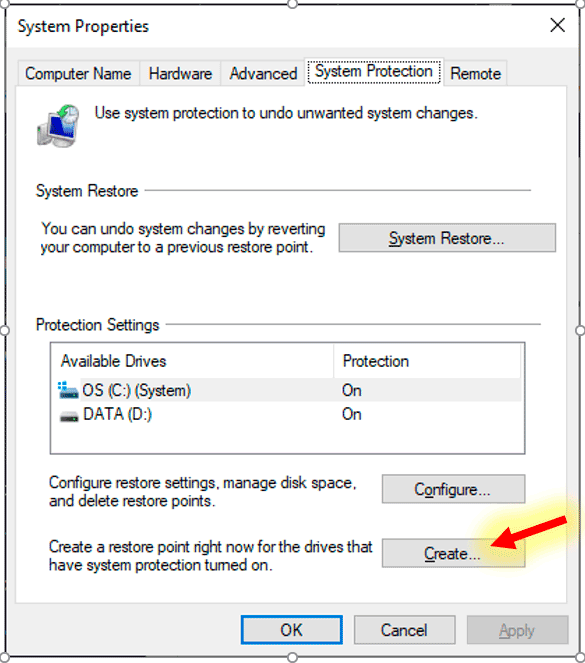
- The System Properties window will open. On the System Protection tab in System Properties, select Create.
- Type a description for the restore point, and then select Create and then click OK.
Here’s a video I found on YouTube if you need extra guidance.